Profile Control as general Tolerance
General Tolerance on a drawing establishes a default tolerance, thus saving repetitive annotations on the drawing. Previous Tip (General Tolerance) demonstrated Plus / Minus Dimensions


General Tolerance on a drawing establishes a default tolerance, thus saving repetitive annotations on the drawing. Previous Tip (General Tolerance) demonstrated Plus / Minus Dimensions

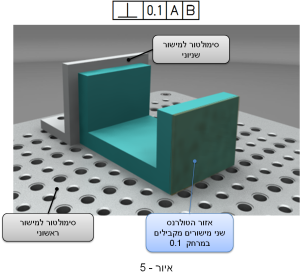
(ASME Y14.5-2009, ISO 1101:2012) Orientation deviation is controlled and measured against a Datum Reference Frame, or in short – DRF. The datums and the reading

Why BASIC Dimensions should not be in a Dim Report This tip complies with ASME Y14.5-2009 and ISO1101:2012 The most significant difference between assigning dimensions

Please contact:
Info@TES-tec.net
+972 74 704 7060
or

To learn more about
upcoming On-Line/Frontal GD&T training Seminars
Please contact
Info@TES-tec.net
60 74-704-70 (972)+
or
Fill out the form